Forest Leaves Crochet Cocoon Shrug Pattern (Free)
Looking for a free crochet cocoon shrug pattern that’s stylish, beginner-friendly, and quick to make? The Forest Leaves Crochet Cocoon Shrug is crocheted using bulky-weight yarn, making it a fast and satisfying project with a beautiful drape and elegant leaf-inspired texture.
Whether you’re looking for an extra layer on cool evenings, a cosy cardigan-style wrap for everyday wear, or your next relaxing crochet project, this shrug is designed to become a versatile wardrobe favourite.
The pattern includes written instructions for 11 sizes (XXS–6XL), yarn recommendations, gauge information, and a step-by-step YouTube video tutorial.
Download the Free Printable Size Chart
Choosing the correct size is one of the most important parts of making a crochet garment.
Download the free printable Forest Leaves Crochet Cocoon Shrug Size Chart to get the complete finished measurements in both inches and centimetres, including rectangle dimensions and armhole measurements.
It’s a handy reference to keep beside you while you crochet.
👉 Download the free size chart below.
How to avail this pattern
BEST WAY:
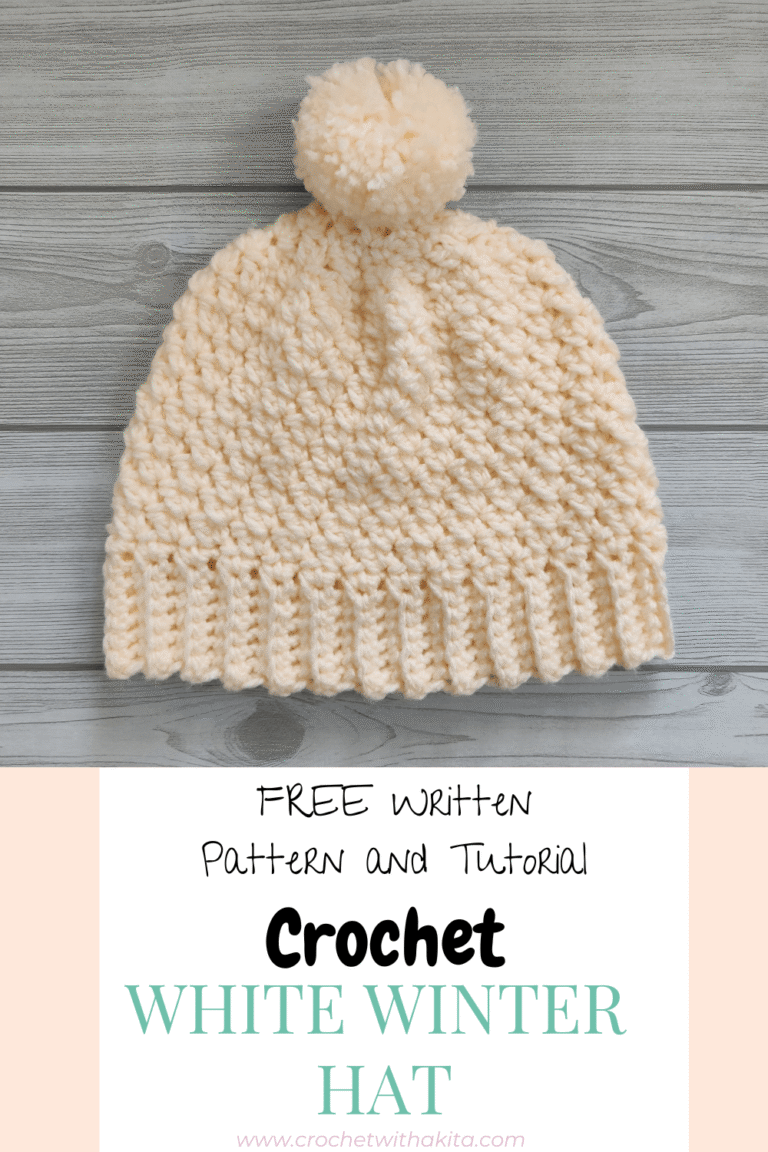
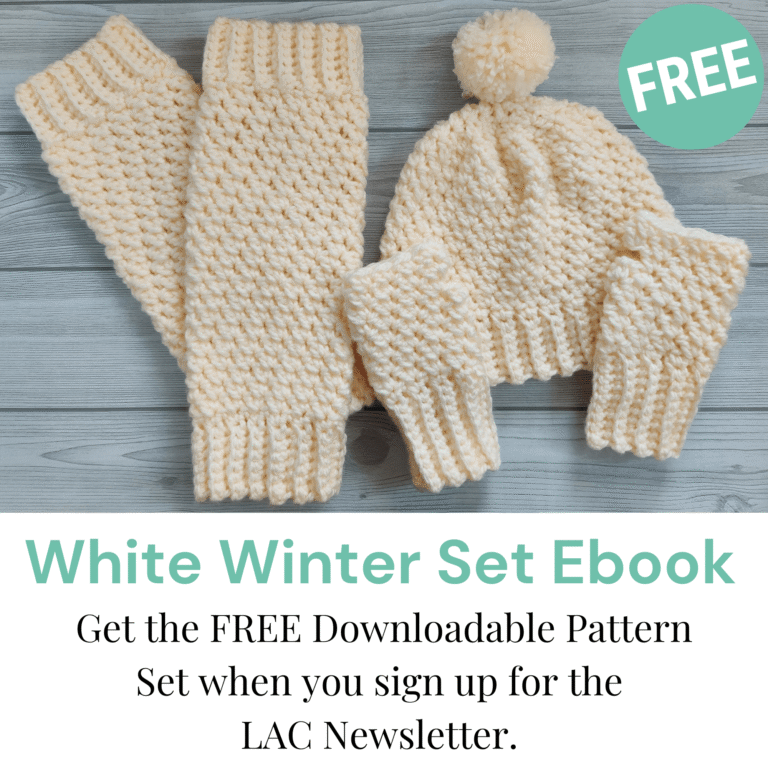
🎁 Grab your FREE Downloadable White Winter Set eBook Here
For a limited time, subscribe to the free Let’s All Crochet Newsletter and get instant access to the free White Winter Set eBook, featuring the White Winter Hat, Wrist Warmers, and Leg Warmers crochet patterns.
The other ways to get this pattern are:
- Scroll below for the free written pattern.
- Visit the Lets All crochet YouTube channel for an absolute beginner tutorial.
- Shop the pattern at any of my shops. This is a print friendly ad free version. Your support is greatly appreciated
You can purchase the AD FREE pattern. It is available in the form of a downloadable, low cost PDF (less than a coffee) in my shops. Click your favorite place to shop patterns. Print and crochet at your convenience. Give yourself this gift! You deserve this!!
PATTERN DETAILS
| Feature | Details |
|---|---|
|
Skill Level |
Easy |
|
Yarn Weight |
Bulky / Chunky (#5) |
|
Hook Size |
6.5 mm (K) |
|
Sizes |
XXS–6XL |
|
Construction |
One rectangle with minimal seaming |
|
Pattern Repeat |
4-row repeat |
|
Video Tutorial |
✓ Included |
|
Printable PDF |
✓ Available |
|
Language |
US Crochet Terms |
Perfect For
- Your first crochet garment
- Weekend crochet projects
- Handmade gifts
- Layering during spring, autumn, and cool summer evenings
- Building a handmade wardrobe
- Using bulky or chunky weight yarn
- Crocheters who enjoy wearable projects
- Comfortable everyday outfits
Inspiration
Hello friend!
The idea for the Forest Leaves Crochet Cocoon Shrug came from quiet walks beneath tall trees, where sunlight filters through gently swaying leaves. I wanted to design a crochet garment that reflected that peaceful feeling and the soft, organic shapes found in nature.
The name Forest Leaves celebrates those calming moments outdoors and the beauty of handmade pieces inspired by the natural world. I chose colours and textures that remind me of forests, creating a shrug that’s simple, elegant, and easy to wear with almost any outfit.
I hope this pattern encourages you to slow down, enjoy every stitch, and create something you’ll treasure for years to come.
⭐ Add Crochet with Akita as a Preferred Google Source ⭐
Love my crochet patterns, tutorials, and crochet tips?
By adding Crochet with Akita as one of your preferred Google sources, you’re telling Google’s AI that you’d like to see more of my crochet content when you search.
👉 https://www.google.com/preferences/source?q=crochetwithakita.com
Thank you for supporting my work!
Prefer the Printable PDF?
If you’d rather crochet from a printer-friendly pattern, the premium PDF is available in my shop.
The printable version includes:
- Ad-free, printer-friendly layout
- Full written instructions
- Stitch chart
- Swatch instructions
- Easy-to-read formatting
- Lifetime access to download again whenever you need it
It’s perfect for printing, using on a tablet, or keeping in your crochet pattern binder.
Now gather your yarn and hook, and let’s crochet the Forest Leaves Crochet Cocoon Shrug!
Love this pattern but not quite ready yet? Save it to Pinterest!
Skill Level
Easy | Beginner Friendly
If you’re comfortable with basic crochet stitches such as chain, single crochet, and double crochet, you’ll find this pattern relaxing and enjoyable. Once you’ve worked a few repeats, the stitch pattern becomes easy to remember, making it perfect for mindful crocheting.
Materials
Materials needed
- Similar yarn: lion brand
- Crochet hook: 6 mm
- Tapestry needle
- Stitch markers
- Scissors
- Tape measure
- Tape measure simple
- Yarn winder
Best Yarn for the Forest Leaves Crochet Cocoon Shrug
This pattern is designed for bulky or chunky (Category 5) yarn, creating a shrug that’s cosy without feeling heavy. The open stitch pattern allows the fabric to drape beautifully while still showcasing the delicate leafy texture that inspired the design.
For my sample, I used a local 100% acrylic bulky yarn, but many bulky-weight yarns will work beautifully for this project.
Recommended Yarn
- Lion Brand Hue + Me
- Lion Brand Wool-Ease Thick & Quick
- Knit Picks Tuff Puff
- Paintbox Yarns Simply Chunky
- Premier Basix Chunky
- Stylecraft Special Chunky
Yarn Substitutions
For the best stitch definition, choose a smooth bulky-weight yarn that allows the leafy texture to stand out. Solid and lightly heathered colours show off the stitch pattern particularly well, while heavily variegated yarns can hide some of the texture.
If you’re looking for a lightweight everyday shrug, acrylic is an excellent choice because it’s soft, affordable, and easy to care for. For a warmer version, try a wool or wool-blend yarn, while cotton blends create a breathable shrug that’s perfect for milder weather.
Whatever yarn you choose, make sure you check your gauge before starting so your finished shrug matches the intended size.
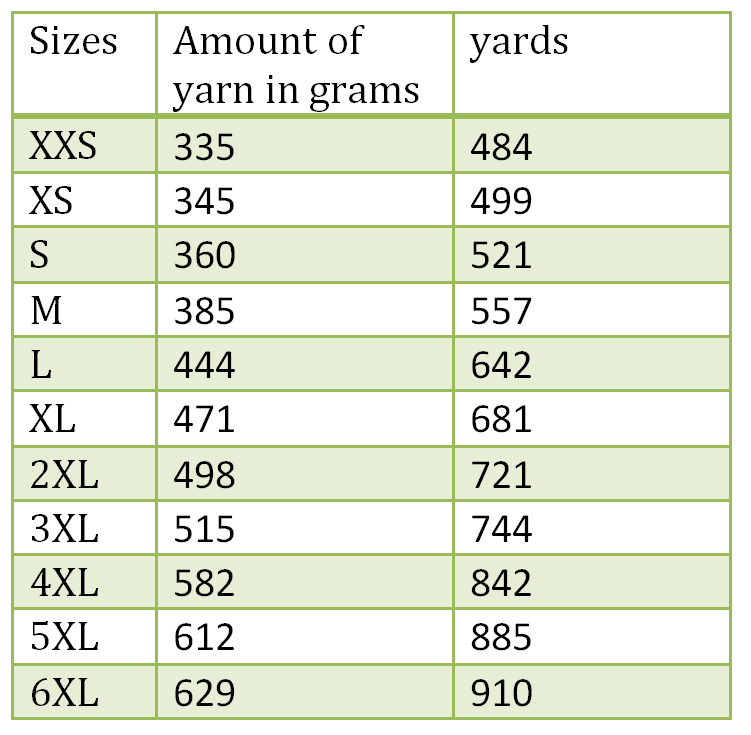
Yarn Requirements
The table below shows the amount of yarn needed for each size.
Recommended Crochet Hook
6.5 mm (K) crochet hook
Taking a few minutes to make a swatch before starting can make a big difference to the finished fit.
Notions
- Stitch markers
- Tapestry needle
- Measuring tape
- Scissors
Gauge
Getting the correct gauge is important for crochet garments. It ensures your finished shrug has the intended fit and drape.
Pattern Gauge
- 3 stitch repeats = 4 inches (10 cm)
- 2 row repeats = 4 inches (10 cm)
Crochet the swatch provided in the pattern before beginning and adjust your hook size if necessary.
Prefer a printable version? The premium PDF includes a clean, ad-free layout with a stitch chart, swatch instructions, and easy-to-follow formatting for a more enjoyable crocheting experience.
Abbreviations
- ” = inches, cm= centimeters
- BLsc = back loop single crochet
- ch = chain
- ch- 1 sp= chain 1 space
- ch- 2 sp= chain 2 space
- dc = double crochet
- fig= figure
- hk = hook
- rep = repeat
- RS = right side, WS= wrong side
- sc = single crochet
- sk = skip stitch
- slst = slip stitch
- st = stitch
Special stitches
BLsc = back loop single crochet
Figure 2: Back loop shown by the needle
Insert hook into the back loop only of the next stitch, yarn over and pull up a loop, yarn over and pull through both loops on the hook.
Pattern Notes Before You Begin
- The pattern is written in US terminology.
- The shrug is worked back and forth in rows till we make a rectangle of the size desired.
- The rectangle is then folded in half and the sides are sewed together leaving a gap for armholes.
- Then work the edging for the centre of the shrug and the armholes.
- Ch 1 does not count as a stitch. Ch 3 counts as a dc.
- Shrug will have an open front as seen in style picture. Sizes are mentioned in the format XXS (XS, S, M, L, XL) (2XL, 3XL, 4XL, 5XL, 6XL).
Please highlight the size you are making carefully in the pattern to avoid confusion due to many sizes.
- This pattern is in multiples of 4 + 3.
Now grab your yarn, make a cup of tea, and let’s start crocheting the Forest Leaves Cocoon Shrug!
Finished Sizes
Available in 11 inclusive sizes (XXS–6XL) to fit a wide range of body measurements.
For the best fit, choose your size based on your bust measurement rather than your usual clothing size.
📥 Download the free printable size chart above for the complete finished measurements in inches and centimetres, including rectangle dimensions and armhole measurements.
Pattern
Foundation ch: 103 (107, 111, 119, 127, 135) (143, 147, 155, 163, 167).
Alteration note: Ch any multiple of 4+3 as the width. Ch width of rectangle if gauge is not matched, see in the size chart.
Row 1 (RS): Sc in 2nd ch from hk, sc in each ch across. -102 (106, 110, 118, 126, 134) (142, 146, 154, 162, 166) sc
Row 2 (WS): Ch 1, turn, sc in 1st sc, sc in each sc across.
Row 3: Ch 3 (counts as a dc), turn, sk 1st sc, dc in next sc, *ch 2, sk next 2 sc, dc in next 2 sc; rep from * across. -52 (54, 56, 60, 64, 68) (72, 74, 78, 82, 84) dc
Figure 3: Row 3
Row 4: Ch 4 (counts as a dc and ch 1), turn, sk first 2 dc, 2 dc in next ch- 2 sp, *ch 2, sk next 2 dc, 2 dc in next ch- 2 sp; rep from * till last ch- 2 sp, ch 1, sk next dc, dc in 3rd ch of ch 3.
Figure 4: Row 4
Row 5: Ch 1, turn, sc in 1st dc, sc in next ch- 1 sp, sc in next 2 dc, *2 sc in next ch- 2 sp, sc in next 2 dc; rep from * till last dc, sc in sp made by ch- 4, sc in 3rd ch of ch 4. -102 (106, 110, 118, 126, 134) (142, 146, 154, 162, 166) sc
Figure 5: End of row 5
Figure 6: Row 5
Row 6: Rep row 2.
Figure 7: Row 6
Row 7 to row 50 (50, 50, 50, 54) (54, 54, 54, 58, 58, 58): Rep rows (3 to 6) for pattern 11 (11, 11, 11, 12, 12) (12, 12, 13, 13, 13) more times.
Alteration note: Repeat rows (3 to 6) for pattern until the required height is reached (see chart in size section).
Leave 25”/ 64 cm of yarn and fasten off.
Finishing
Step 1: Fold
Place the rectangle with the RS facing up (fig 9).
Fold the rectangle in half. Bring the last row towards the bottom chain (fig 10). After folding the WS will face up. Place the sides exactly against one another so that the stitches on both sides match.
Figure 10: Folded shrug
Step 2: Add stitch marker
From the top of each side, leave a gap for the armholes and place stitch markers (fig 11). Make sure the gap is same on both sides.
Figure 11: How to sew sides, SM= stitch marker
Armhole sizes:
6.5 (6.5, 7, 7, 7.5, 7.5) (7.5, 8, 8, 8.5, 8.5)”
16.5 (16.5, 18, 18, 19, 19) (19, 20.5, 20.5, 21.5, 21.5) cm
(Note: Armhole will be double this size when finished)
Step 3: Sew
With the tail end left behind, sew one side closed from bottom up till stitch marker leaving the armhole gap open. Cut a piece of yarn, about 25” (64 cm). Use it to sew the other side in the same way. Use any stitch to sew sides closed (I have used the whip stitch). Weave in any remaining ends.
Tip: Before weaving in ends and adding a border, wear the shrug and check fit of shrug and armholes, adjust if needed. While weaving in ends go through only one side of shrug.
After sewing open up the shrug and turn it inside out so that RS faces up.
Border: Work on RS
Figure 12: Where to attach yarn for border
Shrug centre border: on RS
Join yarn at the bottom chain of the shrug on RS as shown (fig 12).
Rnd 1: Ch 1, sc in same st, sc in each st sround, slst to 1st sc.
Note: St count does not matter.
Rnd 2: Ch 1, BLsc in 1st sc, BLsc in each sc around, slst to 1st sc.
Rnd 3 to 6: Rep rnd 2.
Optional For sizes 3XL to 6XL Only= Rnd 7, 8: Rep rnd 2.
Alteration note: Rep rnd 2 as many times as desired.
Fasten off and weave in ends.
Armhole border: on RS
Join yarn near armhole seam (fig 12 above).
Rnd 1: Ch 1, sc in the same sp, sc around, slst to 1st sc.
Distribution of scs (fig 13): Make 1 sc at the side of each sc, 2 scs at the side of dc. Total st count does not matter.
Figure 13: Rnd 1 of sleeve, sc distribution
Rnd 2: Ch 1, BLsc in 1st sc, BLsc in each sc around, slst to 1st sc.
Rnd 3 to 6: Rep rnd 2.
Optional For sizes 3XL to 6XL Only= Rnd 7, 8: Rep rnd 2.
Alteration note: Rep rnd 2 as many times as desired.
Fasten off and weave in ends.
Repeat exactly for other armhole.
Important for other armhole: Start with same number of sc in rnd 1 as the 1st armhole. Make the same number of rnds as the 1st armhole.
Fasten off and weave in ends.
Congratulations! Your Forest Leaves Cocoon Shrug is now ready!
Copyright & Permissions
All content in this pattern, including instructions, photos, and design, is protected by copyright © Let’s All Crochet.
- This pattern is for personal use only. It may not be copied, altered, translated, resold, taught in classes, or redistributed in any form (digital or physical).
- You are welcome to sell finished items made from this pattern on a small scale, but please use your own photos when promoting your work. Credit to Let’s All Crochet as the pattern designer is appreciated.
- If you’d like to share this pattern, you may share one photo and a direct link to the pattern on crochetwithakita.com. Please do not share or repost the instructions themselves.
This free crochet pattern is provided by Let’s All Crochet for personal use and complies with EU GPSR safety requirements. Read more here

Lorem ipsum dolor sit amet, consectetur adipiscing elit. Ut elit tellus, luctus nec ullamcorper mattis, pulvinar dapibus leo.
Hey, I’m Aki!
Crochet has been a huge part of my life for the past few years, and I still can’t believe I get to do this every day because of wonderful people like you. I’m so happy you’re here!
I design fun, unique crochet patterns with beginner-friendly video tutorials because I believe you should never feel limited—in crochet or in life!