How to Read a Crochet Pattern for Beginners (Step-by-Step Guide)
Have you ever opened a crochet pattern, looked at all the abbreviations, numbers, and symbols, and immediately thought, “What on earth am I looking at?”
Almost every crocheter feels this way the first time they try to read a written pattern. It can look like a completely different language..almost like gibberish.
Crochet patterns aren’t intentionally designed to confuse you. They’re simply a short and organized way for designers to explain how to make a project. Once you understand how they’re written, everything makes sense.
Once you start reading patterns, a whole new world of crochet opens up.
Reading crochet patterns isn’t a talent—it’s a skill. And like learning a new stitch, it gets easier every time you practice.
In this guide, I’ll show you exactly how to read a crochet pattern step by step, so you can stop feeling overwhelmed and start crocheting with confidence.
By the end of this article, you’ll know:
- What a crochet pattern is
- How to read crochet instructions
- What repeats, abbreviations, and special stitches mean
- The most common mistakes beginners make (and how to avoid them)
- Simple tips that will make reading patterns much easier
Whether you’re a new crocheter who has just picked up your first crochet hook or you’ve been avoiding written patterns for years, this guide will help you understand exactly what you’re reading—and give you the confidence to tackle your next project.
🎁 Free Printable Guide
Download the printable guide to keep beside you while you crochet. Instead of scrolling back to this article every few minutes, you’ll have all the key information, examples, and cheat sheets in one handy guide.
Table of Contents
- What Is a Crochet Pattern?
- Why Learn to Read Crochet Patterns?
- The Anatomy of a Crochet Pattern
- Crochet Pattern Anatomy at a Glance
- Understanding Crochet Pattern Instructions
- Reading a Crochet Pattern Step by Step
- Understanding Stitch Counts
- Common Beginner Mistakes
- Tips for Reading Crochet Patterns More Easily
- Frequently Asked Questions
- What’s next?
What Is a Crochet Pattern?
A crochet pattern is a set of written instructions that tells you exactly how to create a crochet project. Think of it like a recipe. Just as a recipe lists the ingredients and explains each step needed to bake a cake, a crochet pattern tells you what materials you’ll need and guides you through every stitch from beginning to end.
Crochet patterns have a similar structure so that crocheters all over the world can easily read them. Once you understand it, you’ll find it much easier to read any pattern, whether it’s for a hat, blanket, sweater, or amigurumi toy.
You definitely don’t need to memorize anything. A good pattern explains exactly what you need to know before the instructions start.
Why Learn to Read Crochet Patterns?
Many beginners learn to crochet through YouTube videos, and they’re a fantastic way to learn new stitches and techniques. But learning to read written crochet patterns gives you even more freedom and open up a whole new world of possibilities.
1. Access Thousands of Crochet Patterns
Reading patterns gives you access to thousands of designs from independent designers, yarn companies, books, magazines, and websites—only a small fraction of which have video tutorials.
2. Crochet at Your Own Pace and Save Time
A written pattern waits for you. You can reread instructions, mark your progress, and continue exactly where you left off—without constantly pausing or rewinding a video. Need to check one step? Simply reread the instruction instead of searching through a video.
3. Build Your Confidence
Understanding written patterns builds your confidence as a crocheter.
4. Follow Sizes and Stitch Counts More Easily
Written patterns clearly show multiple sizes, stitch counts, repeats, and row-by-row instructions. This makes them much easier to follow when you’re crocheting garments or other detailed projects.
5. Become a More Independent Crocheter
Instead of depending on someone to demonstrate every stitch, you’ll understand exactly what the designer wants you to do.
The Anatomy of a Crochet Pattern
At first glance, crochet patterns can look overwhelming. You might see abbreviations, measurements, symbols, and pages of instructions that seem impossible to understand.
But most crochet patterns actually follow a similar structure in the form of sections. Once you learnt to read these, then you can read any crochet pattern easily.
Most crochet patterns are divided into three main sections:
- Introduction – This includes everything from the pattern name to the pattern notes. Read this section before you start crocheting, as it contains important information such as the materials you’ll need, gauge, finished measurements, abbreviations, and any special notes.
- Pattern Instructions – This is the main part of the pattern. It tells you exactly how to crochet the project, step by step. Depending on what you’re making, the instructions may be divided into sections such as the body, sleeves, edging, assembly, or other parts of the project.
- Finishing – Once you’ve completed the crochet, the finishing section explains how to complete your project. This may include weaving in ends, seaming pieces together, blocking, adding buttons or other embellishments, and any final finishing touches.
Now let’s look at the each mini sections you’ll find in almost every crochet pattern.
Skill Level
The skill level tells you how much crochet experience the designer expects you to have. Most patterns are labelled as Beginner, Easy, Intermediate, or Advanced.
Don’t let these labels intimidate you. An advanced pattern doesn’t mean you can’t make it—it simply means it may include more techniques, shaping, or special stitches than a beginner pattern. If you’re willing to learn new skills, you can often crochet projects above your current skill level.
If you’re viewing a pattern description before purchasing or corhceting it, checking the skill level can help you decide whether it’s the right project for your current experience or if you’re ready for a new challenge.
Related article: Understanding Crochet Skill Levels
Finished Measurements
Finished measurements tell you the actual size of the completed project.
For wearable items, you’ll often see body measurements (the person the item is designed to fit) and finished measurements (the size of the finished item). Both help you choose the correct size.
For example:
- Hat: Choose the size based on the head circumference.
- Garment: Choose the size based on your bust measurement.
Tip: Don’t rely only on size labels like Small, Medium, or Large. Always compare your measurements to the pattern’s size chart to find the best fit.
Related article: How to Choose the Right Crochet Pattern Size
Materials & Tools
This section lists everything you’ll need before you begin your project, including the yarn, hook, and any additional tools or notions.
Read through the list before you start and decide whether you need to purchase the recommended yarn or substitute it with something from your stash. Also check for any extra items, such as buttons, stitch markers, or pompoms, so you have everything ready before you begin.
Having all your materials prepared before you start makes following the pattern much smoother and helps prevent interruptions later.
Related article: How to Substitute Yarn in a Crochet Pattern
Gauge
Have you ever finished a crochet project only to discover it was much too big or too small? In most cases, the culprit is gauge.
Gauge is how many stitches and rows fit within a specific measurement, usually a 4-inch (10 cm) square. Because everyone crochets with a slightly different tension, two people using the same yarn and hook can end up with different-sized projects.
Checking your gauge allows you to match your tension to the designer’s so your finished project turns out the size the pattern intends. This is especially important for garments, hats, and other fitted projects.
Many crocheters are tempted to skip the gauge swatch because they’re excited to get started. However, spending a few minutes checking your gauge can save hours of frustration later.
Related article: What Is Crochet Gauge and Why Does It Matter?
Abbreviations
This is the section that makes crochet patterns look like gibberish—but don’t worry, it’s much simpler than it seems!
Crochet patterns use abbreviations to keep instructions short and easy to read. Imagine if every pattern wrote out “single crochet” hundreds of times instead of “sc”. Patterns would be much longer and harder to follow. It’s similar to a recipe using tsp instead of teaspoon.
Here are a few common abbreviations:
- ch = chain
- sc = single crochet
- dc = double crochet
- sl st = slip stitch
You’ll usually find a list of abbreviations in the pattern before the instructions begin, so there’s no need to memorize them. You can simply refer back to the list whenever you need it. Over time, you’ll naturally remember the most common abbreviations and reading patterns will become much easier.
Related article: Crochet Abbreviations Explained (A–Z Guide)
Special Stitches
Some crochet patterns use special stitches that aren’t part of the basic crochet stitches you already know.
Don’t worry.. the designer isn’t expecting you to know them! Before the pattern instructions begin, you’ll usually find step-by-step instructions explaining exactly how to work each special stitch.
Always read this section before you start crocheting. It will save you from having to stop halfway through the pattern to figure out an unfamiliar stitch.
Pattern Notes
Pattern notes contain important information that doesn’t fit elsewhere in the pattern. Think of them as the designer’s instructions before the crochet begins. They contain information that will help you understand how the pattern works and avoid common mistakes later.
Depending on the pattern, the notes may explain:
- How the project is constructed (for example, worked from the top down or bottom up)
- Whether the turning chain counts as a stitch
- Whether the pattern uses US or UK crochet terminology
- Helpful tips for choosing the correct size or customizing the project
Taking just a minute to read the pattern notes before you begin can save you a lot of confusion later. Many of the questions crocheters have while working through a pattern are already answered in this section.
🎁 Finding crochet patterns a little less confusing?
Download my printable How to Read a Crochet Pattern Guide so you can keep the cheat sheets and examples beside you while you crochet.
Pattern Instructions
This is the heart of the crochet pattern and the section you’ll spend most of your time following. It tells you exactly what to crochet, step by step, from the first stitch to the last.
Pattern instructions are made up of several parts that work together:
- Rows or rounds tell you the order to crochet.
- Abbreviations such as ch, sc, and dc keep the instructions short and easy to read.
- Stitch counts help you check that you have the correct number of stitches after each row or round.
- Repeats, shown using parentheses ( ), brackets [ ], asterisks (*), or other symbols, tell you which instructions should be worked multiple times.
Depending on the project, the instructions may also be divided into sections. For example, a garment pattern may include separate instructions for the body, sleeves, neckline, and finishing, while a hat pattern may be divided into the crown, body, and brim.
At first, all these abbreviations, numbers, and symbols can look overwhelming. Read one row or round at a time, check your stitch count regularly, and refer back to the abbreviation list whenever you need to. With practice, reading pattern instructions will become much more natural.
Repeats
These keep patterns shorter and prevent the same instructions from being written over and over again.
Some of the most common repeat symbols include:
- ( ) – Often groups stitches that are worked together.
- [ ] – Usually groups a sequence of stitches that you’ll repeat.
- * – Marks the beginning of instructions to repeat until another symbol or the end of the row.
Different designers may use these symbols slightly differently, so always read the pattern notes before you begin.
Once you understand how repeats work, you’ll find that they actually make crochet patterns much quicker and easier to read.
Finishing Instructions
You’ve made the last stitch—but your project isn’t quite finished yet!
The finishing instructions explain everything you need to do so that your projects looks complete and professional. This may include weaving in your ends, seaming pieces together, blocking your project, sewing on buttons, or adding other finishing touches.
It can be tempting to skip these final steps, especially when you’re excited to use or wear your project. However, taking a little extra time to finish your work properly can make a huge difference to the final result. It’s often what transforms a homemade project into one that looks neat and professional.
Crochet Pattern Anatomy at a Glance
Pattern Part | What It Tells You |
Skill Level | Helps you choose a project that matches your experience. |
Finished Measurements | Shows the completed size of the project so you can choose the correct size. |
Materials & Tools | Lists the yarn, hook, and any other supplies you’ll need. |
Gauge | Helps ensure your finished project matches the intended size. |
Abbreviations | Explains the shortened stitch names used throughout the pattern. |
Special Stitches | Describes any stitches that aren’t considered standard. |
Pattern Notes | Shares important information to read before you begin. |
Pattern Instructions | Guides you through the project one step at a time. |
Finishing Instructions | Explains how to complete and finish your project. |
Understanding Crochet Pattern Instructions Examples
Once you understand the different parts of a crochet pattern, it’s time to learn how to read the actual instructions.
Don’t try to read the entire row at once. Instead, break it into small pieces and complete one instruction at a time.
Let’s look at a simple example 1.
Row 1: Ch 21. Sc in 2nd ch from hook and in each ch across. (20 sts)
It may look confusing at first, but let’s translate it into plain English.
- Ch 21 – Make 21 chain stitches.
- Sc in 2nd ch from hook – Skip the first chain next to your hook and work one single crochet into the second chain.
- Sc in each ch across – Continue making one single crochet into every remaining chain until you reach the end.
- (20 sts) – When you’ve finished the row, you should have 20 single crochet stitches.
As you become more comfortable reading patterns, you’ll naturally recognize these instructions without needing to translate each abbreviation.
Understanding Stitch Counts
At the end of many rows or rounds, you’ll see a stitch count in parentheses, such as (20 sts).
This tells you how many stitches you should have after completing that row or round. Checking your stitch count regularly helps you catch mistakes early before they become bigger problems.
Tip: Get into the habit of counting your stitches at the end of every row or round, especially while you’re learning.
Example 2
Row 2: Ch 3 (counts as dc), 2 dc in first st, *sk next 2 sts, 5 dc in next st; rep from * till last 3 st, sk next 2 sts, 3 dc in last st.
Let’s Read It Together
Ch 3 (counts as dc)
Start the row by making 3 chain stitches. These chains count as your first double crochet.
2 dc in first st
Work 2 double crochets into the very first stitch. Together with the turning chain, this gives you 3 double crochets at the edge.
*** sk next 2 sts**
Skip the next 2 stitches. The * shows the repeat starts here.
5 dc in next st
Work 5 double crochets into the next stitch.
rep from * to last 3 sts
Go back to the asterisk and keep repeating the instructions until only 3 stitches remain.
sk next 2 sts, 3 dc in last st
Skip the next 2 stitches, then work 3 double crochets into the final stitch to finish the row.
What Did We Learn?
This single row contains many of the things you’ll see in most crochet patterns:
- Rows tell you where you are in the pattern.
- Abbreviations keep the instructions short.
- Repeats prevent the same instructions from being written over and over.
- Stitch placement tells you exactly where to work each stitch.
Common Beginner Mistakes When Reading Crochet Patterns
Everyone makes mistakes when learning to read crochet patterns. Here are the ones I see most often—and how to avoid them.
1. Jumping Straight to the Instructions❌
It’s tempting to start crocheting immediately, but you’ll often miss important information about yarn, gauge, special stitches, or how the project is constructed.
2. Ignoring the Gauge Swatch❌
Skipping the gauge swatch might save five minutes now, but it could mean hours of frustration later if your project doesn’t fit.
3. Forgetting to Count Stitches❌
A single missed increase or skipped stitch can throw off the entire project. Count your stitches regularly so you catch mistakes early.
4. Not Checking Whether the Pattern Uses US or UK Terms❌
The same stitch names can mean completely different things depending on the terminology the designer uses.
5. Trying to Read the Whole Pattern at Once❌
Don’t try to understand the instructions section before you begin. Read one row or round at a time and focus only on the instruction you’re working on. this will keep you from getting overwhelmed and also help you finish the pattern.
Tips for Reading Crochet Patterns More Easily
Scan the entire pattern before making your first stitch.
This gives you an overview of the project and helps you spot any special stitches, techniques, or materials you’ll need.
Highlight or circle the size you’re making.
This makes it much easier to follow multi-size patterns without accidentally reading the wrong instructions.
Keep the abbreviation list nearby.
There’s no need to memorize every abbreviation. Refer to the list whenever you need it, and you’ll naturally learn the most common ones over time.
Use stitch markers to mark repeats or important sections.
Stitch markers help you keep your place and make it easier to spot mistakes before they become bigger problems.
Tick off completed rows as you go.
Crossing off each completed row helps you stay organized and prevents you from losing your place.
Count your stitches regularly.
Checking your stitch count at the end of each row or round helps you catch mistakes early, when they’re much easier to fix.
If an instruction seems confusing.
Breaking the instruction into smaller parts often makes it much easier to understand.
Don’t panic if you don’t understand a row immediately.
Take the time to read again. Even experienced crocheters reread instructions. Check if there is a link or the video tutorial and see if the images help you understand. If something still doesn’t make sense, contact the designer—most are happy to help.
Frequently Asked Questions About Reading Crochet Patterns
Are crochet patterns difficult to read?
Not at all. They may look confusing at first because they use abbreviations and symbols to keep the instructions short. Once you understand the common abbreviations and how patterns are structured, reading them becomes very easy.
Can beginners learn to read crochet patterns?
Absolutely! Most beginners start by following videos, but learning to read written patterns is a skill anyone can develop. Begin with simple patterns, take your time, and don’t be afraid to refer back to the abbreviation list or pattern notes.
Why do crochet patterns use abbreviations?
Abbreviations make crochet patterns shorter and easier to read. Imagine if every “single crochet” was written out in full hundreds of times—it would make patterns much longer. Once you learn the most common abbreviations, you’ll be able to read patterns much more quickly.
What do the numbers at the end of a row mean?
The number in parentheses at the end of a row or round is the stitch count. It tells you how many stitches you should have after completing that row.
For example: (32 sts)
means you should have 32 stitches when you’ve finished the row.
What do parentheses and brackets mean in crochet patterns?
Parentheses and brackets help organize instructions and repeats.
- Parentheses ( ) often group stitches worked into the same stitch or space.
- Brackets [ ] usually group instructions that are repeated several times.
Always check the pattern notes, as some designers use slightly different formatting.
What’s the difference between US and UK crochet terms?
Some stitches have different names depending on the terminology used.
For example:
- US Single Crochet (SC) = UK Double Crochet (DC)
Always check whether the pattern uses US or UK terms before you begin.
What should I do if I don’t understand a crochet pattern?
Start by reading the entire pattern before crocheting. Check the notes, abbreviation list, and any special stitch instructions. If you’re still unsure, read the instruction one repeat at a time instead of trying to understand the whole row at once.
If you’re still stuck, most designers are happy to answer questions about their patterns.
Can I substitute a different yarn?
Usually, yes—but it’s important to choose a yarn with a similar weight and check your gauge. Using a different fiber or thickness may change the size, drape, or appearance of your finished project.
Should I print my crochet patterns?
Many crocheters find printed patterns easier to follow because they can highlight their size, cross out completed rows, or make notes as they work. Others prefer using a tablet or phone. Choose whichever method helps you stay organized.
What’s the easiest crochet pattern for beginners?
Simple scarves, dishcloths, granny squares, and basic hats are excellent first projects. They usually use basic stitches and repetitive rows, making them perfect for practicing your pattern-reading skills.
Final Thoughts/ Whats’s Next?
Learning to read crochet patterns may seem intimidating at first, but it becomes easier with every project you complete. Start with beginner-friendly patterns, take your time, and remember that even experienced crocheters still refer back to pattern notes, stitch counts, and abbreviations.
The more patterns you read, the more confident you’ll become—and before long, you’ll be able to pick up almost any written pattern and know exactly where to start.
🎁 Take This Guide With You
Ready to put what you’ve learned into practice?
Download my free How to Read a Crochet Pattern Guide so you can keep it beside your project while you crochet. It’s filled with printable cheat sheets, examples, and quick references to make reading patterns easier.
🎓 Want to Master Reading Crochet Patterns?
I’m creating a beginner-friendly course that will teach you how to confidently read any crochet pattern using step-by-step lessons, real pattern examples, and practice exercises.
Join the waitlist to be the first to know when enrollment opens—and receive early-bird bonuses and pricing.
Lorem ipsum dolor sit amet, consectetur adipiscing elit. Ut elit tellus, luctus nec ullamcorper mattis, pulvinar dapibus leo.
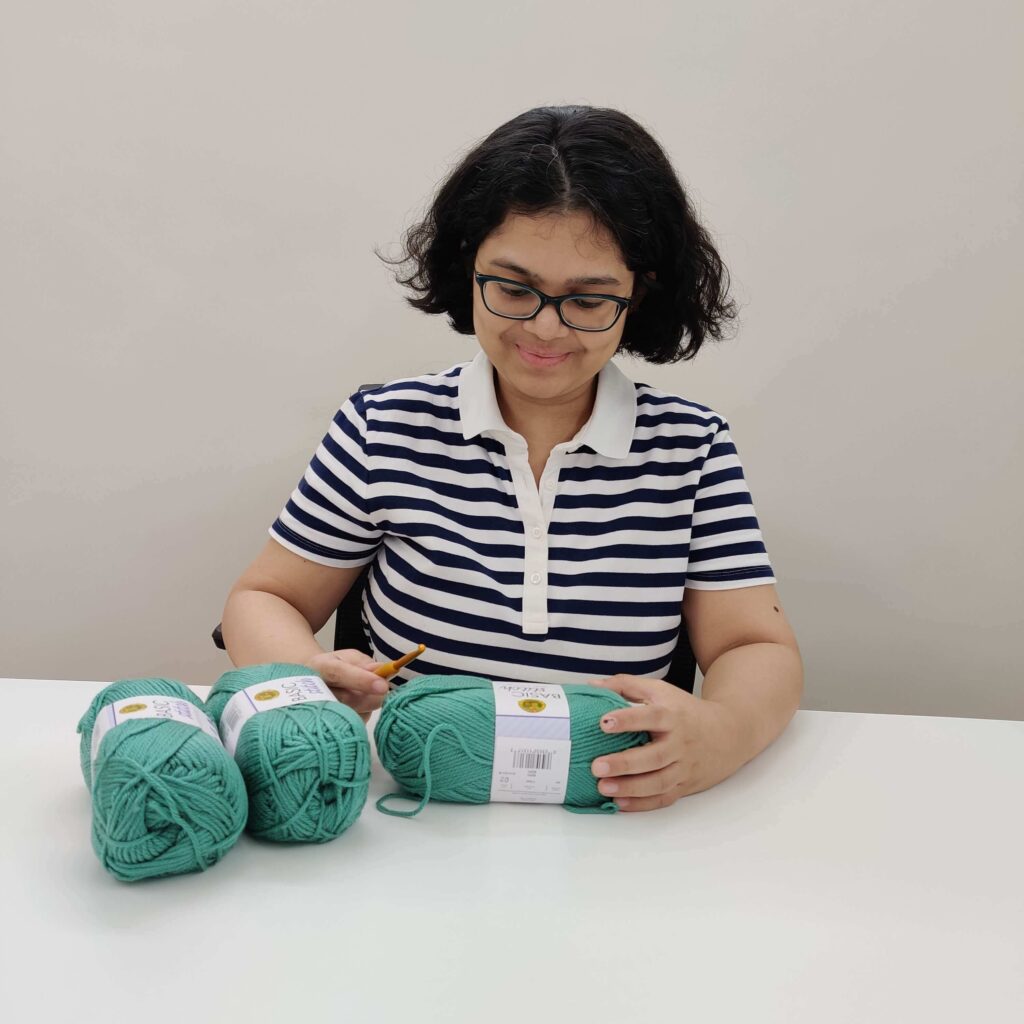
Hey, I’m Aki!
Crochet has been a huge part of my life for the past few years, and I still can’t believe I get to do this every day because of wonderful people like you. I’m so happy you’re here!
I design fun, unique crochet patterns with beginner-friendly video tutorials because I believe you should never feel limited—in crochet or in life!