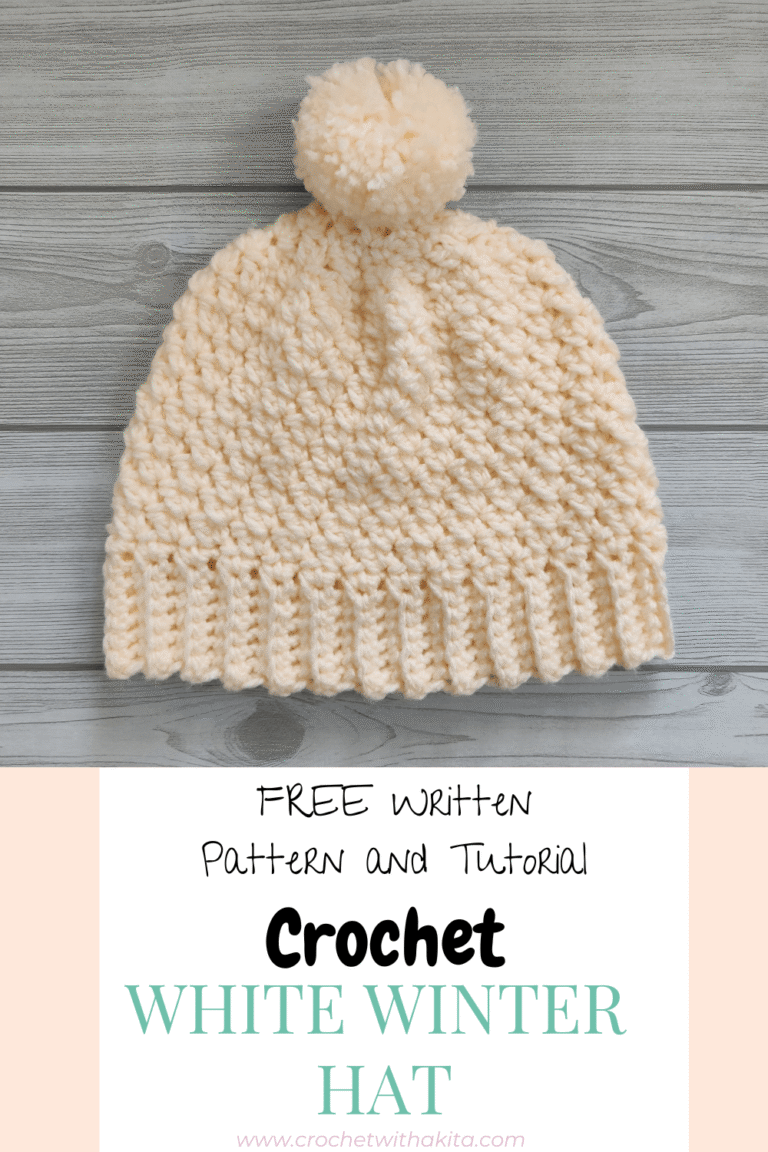
White Winter Hat Easy Crochet Pattern with Bulky Yarn
The White Winter Hat is a cozy crochet beanie made with bulky yarn that’s perfect for keeping warm all winter long. Available in 3 sizes, it’s a quick project that’s ideal for making for yourself, gifting to a loved one, or adding to your handmade winter wardrobe.
In this post, you’ll find everything you need to crochet this easy winter hat, including the materials, stitches, step-by-step instructions, a detailed video tutorial, and the free written crochet pattern.
This post may contain affiliate links. Please see my full disclosure and privacy policy for details.
Watch the step by step tutorial below!
How to avail this pattern
BEST WAY:
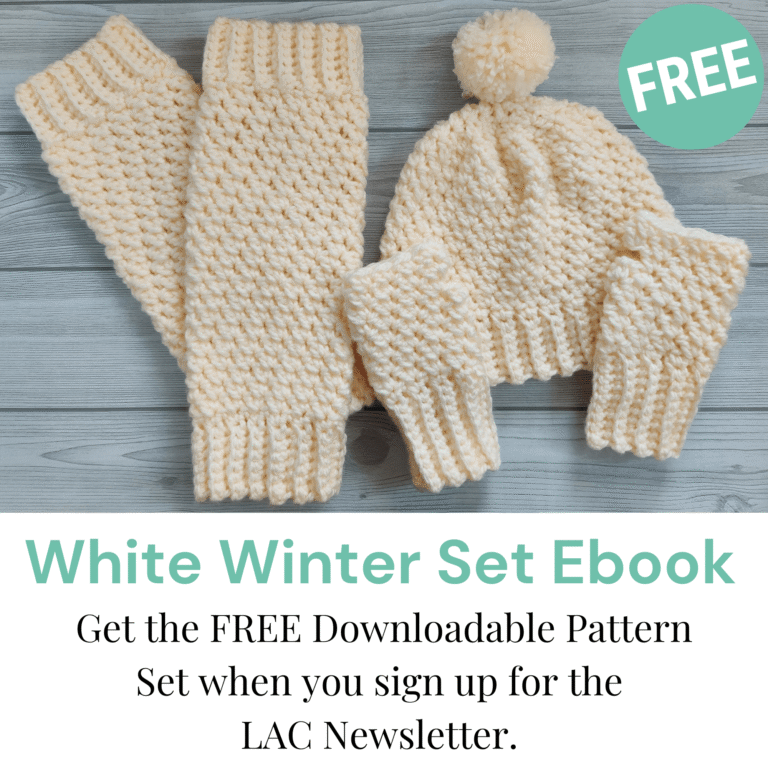
🎁 Grab your FREE Downloadable White Winter Set eBook Here
For a limited time, subscribe to the free Let’s All Crochet Newsletter and get instant access to the free White Winter Set eBook, featuring the White Winter Hat, Wrist Warmers, and Leg Warmers crochet patterns.
The other ways to get this pattern are:
- Scroll below for the free written pattern.
- Visit the Lets All crochet YouTube channel for an absolute beginner tutorial.
- Shop the pattern at any of my shops. This is a print friendly ad free version. Your support is greatly appreciated
You can purchase the AD FREE pattern. It is available in the form of a downloadable, low cost PDF (less than a coffee) in my shops. Click your favorite place to shop patterns. Print and crochet at your convenience. Give yourself this gift! You deserve this!!
Project Overview
Pattern for: A cozy chunky crochet winter hat available in 3 sizes.
Yarn Used: Bulky weight yarn (Category 5).
Difficulty Level: Easy – a quick and relaxing project that’s perfect even for absolute beginners.
Stitches Used: This crochet hat uses basic crochet stitches to create a textured beanie.
Aki’s Notes: The White Winter Hat is part of the White Winter Set and is designed to keep you warm and stylish throughout the colder months. It makes a wonderful gift for family and friends or a cozy addition to your own winter wardrobe. It is meant to be crocheted fast without needing your complete attention, so that it’s a relaxing and calming project.
Perfect For
- Keeping warm on chilly winter days
- Holiday gifting
- Cozy walks and outdoor adventures
- Quick weekend crochet projects
- Last-minute handmade gifts
- Craft fairs and market makes
- Matching hats for family and friends
- Making a matching set of wrist warmers, hat and leg warmers
- Everyday winter wear
- Using up your favorite bulky/ chunky yarn
⭐ Add Crochet with Akita as a Preferred Google Source⭐
By adding Crochet with Akita as a preferred source, you’re telling Google’s AI that you’d like to see more of my crochet patterns, tutorials, and helpful tips in your search results.
https://www.google.com/preferences/source?q=crochetwithakita.com
Things You’ll Love About This White Winter Hat
- Made with bulky yarn for a warm, cozy finish that works up quickly.
- One skein one hour project takes one skien and just one hour to crochet
- Easy crochet pattern that is easy even for beginners
- Available in 3 sizes, making it easy to crochet the perfect fit.
- Seamless construction with no sewing or joining.
- Classic, timeless design that pairs beautifully with any winter outfit.
- Part of the White Winter Set, with matching wrist warmers and leg warmers.
- Perfect for gifting, holiday makes, or keeping yourself warm all winter long.
Inspiration:
Hello friend! One fine day, I was playing around with my cream yarn wanting to make a quick beanie for myself this winter. I wanted to come up with a pattern that was easy and quick but also had a pretty texture to it, and keep my head nice and toasty.
After I crocheted this beanie, I loved it so much that I designed matching White Winter Wrist Warmers and White Winter Leg Warmers to complete the set.
The White Winter Hat looks beautiful in white, cream, or off-white, but you can easily customize it with your favorite color to match your style.
This post includes the free pattern for the White Winter Hat. If you’d like to make the full set, be sure to check out the matching White Winter Wrist Warmers and White Winter Leg Warmers patterns.
Before You Begin
Before you start crocheting, take a few minutes to read through the pattern notes. They include helpful information about sizing, gauge, yarn, and construction that will make the pattern easier to follow.
A quick read now can save you time later and help you achieve the best results.
FAQ & Terms
Terms & Conditions
This crochet pattern is for personal use only. You may not copy, redistribute, resell, share, or claim this pattern as your own.
Can I Sell My Finished Product?
Yes! You may sell finished items made from this pattern in small quantities. Please do not mass produce them, and credit Crochet with Akita as the pattern designer whenever possible.
Where Can I Get Help with a Pattern?
If you have any questions, visit the Crochet with Akita Community or contact me through my website. I’m always happy to help.
Pattern Copyright
Copyright © 2023 Crochet with Akita. All rights reserved. This pattern, including the written instructions, photos, videos, and other content, is protected by copyright and may not be copied, redistributed, translated, or sold without written permission.
General Notes
- Please read through/ glance over the pattern from the start to finish before starting.
- This pattern uses US crochet terminology.
- Numbers at the end of a row / round indicate the number of stitches in that row / round. Usually the stitch count is only mentioned if there is a change in counts.
- Instructions in (round brackets) should be worked in the same stitch.
- Use any bulky or chunky weight/ weight 5 yarn of choice. Match the gauge. If you do not match gauge, you can use the measurements as a guide/ refer to the YouTube video tutorial.
- This pattern is designed for beginners, but is a fun pattern for anyone who wants to make quick projects as gifts this holiday season.
How do you Make a The White Winter Crochet Hat?
Hat construction
- The hat is made from the bottom up.
- We begin with the Hat Band that uses BLsc stitches and is worked in turned rows.
- The Hat Band is joined to form a ring.
- The Main Hat Body is then worked in rounds into the sides of the Hat Band rows.
- With the Main Hat Body complete, we now work a number of decrease rounds at the top of the hat to shape and finish the Crown.
- The beanie hat has an option for a folded brim.
Skills Used
- Knowledge of basic crochet stitches, techniques and terminology is assumed, but refer to the video, it is meant for absolute beginners, can be made even as a first crochet project.
- This is an easy, absolute beginner project, fun for experienced crocheters who want to make fast projects!
- You will need to maintain an accurate stitch count.
- Decreases are made in the crown of hat.
- The ribbing is made by working into back loops of single crochet.
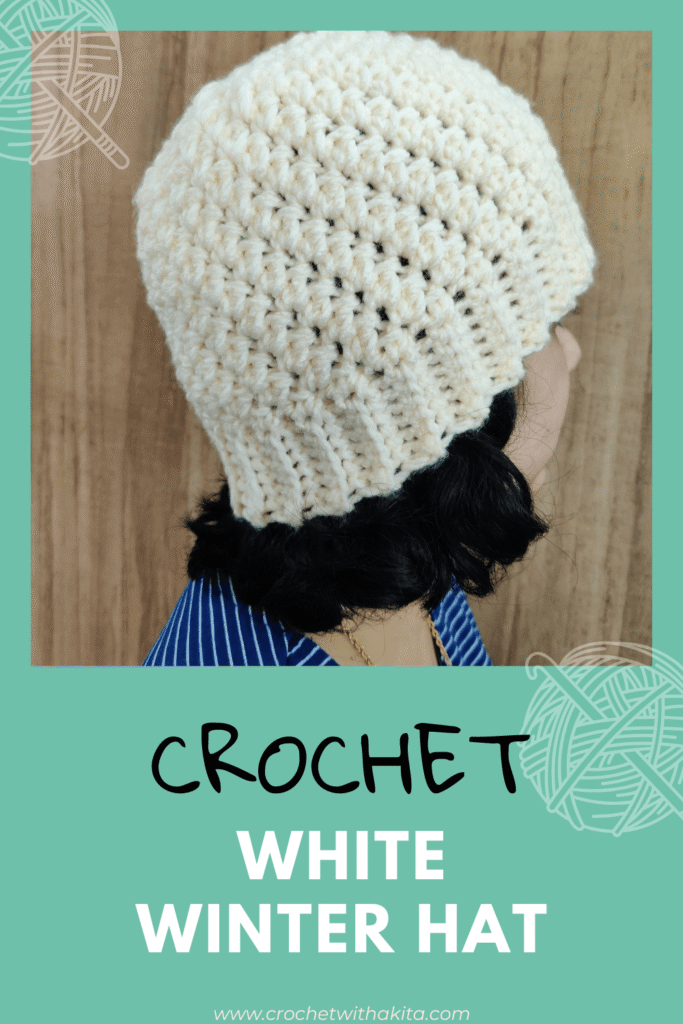
Love this pattern but not quite ready yet? Save it to Pinterest!
Materials needed
- Similar yarn: lion brand
- Crochet hook: 6 mm
- Tapestry needle
- Stitch markers
- Scissors
- Tape measure
- Tape measure simple
- Yarn winder
Yarn: Any chunky or bulky or weight 5 yarn of choice can be used.
Suggested yarn: Lion Brand Hue + Me. This pattern should work well with a range of acrylic and animal fibres of the same yarn weight (I do not recommend cotton or plant based fibres for winter accessories). Different fibres and yarns will produce a different finished result. Always swatch with your chosen yarn to ensure you are happy with the resulting fabric and match gauge before starting.
I have used a local yarn which is 100% acrylic. Yardage: 145 m/ 158 yards in 100/ 3.5 oz of yarn. Each skein has 100 g.
Approx amount needed: 64 (75, 88) g or 101 (119, 138) yards (more or less may be needed depending on alterations made to fit). This is without pompom. 10 g for pompom.
Crochet hook: 6 mm or J size hook. Adjust size to match gauge.
Notions: Tapestry needle, scissors, measuring tape.
Stitch marker is not really needed unless you plan to try on the hat as a beginner, then it will keep the stitches from unraveling.
Blocking: You may wish to block this project, I gave mine a gentle steam block (after placing my finished item on a flat surface or can be done on a mannequin head) to relax the stitches a little and help the stitches to stand out.
Finished sizes with measurements for Adults.
Approximate measurements of the finished hat is given in the tables below to help you choose a suitable size (in cm and inches).
The beanie hat has an option for a folded brim, follow the instructions given. There is also an option for adding a pompom. Use a pompom maker for this.
There are 3 adult sizes offered for this, the small will fit a teen as well. It can be made in any size with some modifications.
In the PDF version of the pattern, the leg warmers and the wrist warmers are offered in 4 sizes each.
Ease
Hats are usually worn with a negative ease (smaller than the head they are designed to fit). The White Winter Hat has a negative ease of about 5cm / 2” so they do not fall of easily.
Gauge:
Sc ribbing: 12 sc and 12 rows= 4” or 10 cm.
Pattern of main body: 11 st and 9 rows= 4” or 10 cm.
The gauge has been given separately for the ribbing and the main pattern. A swatch is not needed as such unless you want to test the yarn fabric, just measure gauge as you crochet hat.
Variation in your gauge will lead to variations in the finished size of your project.
Abbreviations:
US Terms used. Visit Craft Yarn council to see the matching UK term.
- ”= inches, cm= centimeters
- BLsc= back loop single crochet
- ch= chain
- dc= double crochet
- fig= figure
- rep= repeat
- Rnd= round
- RS= right side, WS= wrong side
- sc= single crochet
- sk= skip stitch
- slst= slip stitch
Special stitches
Back loop single crochet
Insert your hook into back loop only, yarn over, pull up a loop, yarn over and pull through 2 loops.
Notes
- Pattern is written using US terminology.
- The hat is worked from bottom up, no seaming needed.
- Make the ribbing in rows first, then work in rounds for body, then in decreasing rounds for crown. Adding pompom is optional.
- Ch 1 does not count as a stitch.
- (sc, dc) in sc, means make an sc and dc in same sc.
How to avail this pattern
- BEST WAY: The pattern is a part of the white winter set, please sign up for the LAC Newsletter to get the FREEPDF Written pattern for the entire set (for a limited time ONLY).
The other ways to get this pattern are:
- Scroll below for the free written pattern.
- Visit the Lets All crochet YouTube channel for an absolute beginner tutorial.
- Shop the pattern at any of my shops. This is a print friendly ad free version. Your support is greatly appreciated
You can purchase the AD FREE pattern. It is available in the form of a downloadable, low cost PDF (less than a coffee) in my shops. Click your favorite place to shop patterns. Print and crochet at your convenience. Give yourself this gift! You deserve this!!
Pattern Support
If you have any questions while making the White Winter Hat, I’m here to help! Join the Let’s All Crochet (now Crochet With Akita) Community, where you can ask pattern questions, share your yarn choices, post your progress, and show off your finished project.
I’d love to see your creations and cheer you on throughout your crochet journey!
Pattern Instructions
Ribbing
Foundation ch: Ch 8 for all sizes.
Alteration note: Ch height of ribbing (about 2- 2.5”). Ch 16 for a folded brim (about 4- 4.5”).
Row 1 (WS): Sc in 2nd ch from hk, sc in each ch across. –7 sc
Row 2 (RS): Ch 1, turn, BLsc in 1st sc, BLsc in each sc across. –7 sc
Row 3 to row 50 (54, 60): Rep row 2.
Do not fasten off.
Alteration note: Rep row 2 till you reach circumference of hat. Total number of rows should be any even number. The ribbing must be snug (about 4” less than head circumference for adults), the stitches will spread out in body of hat.
Join Ribbing
Place the ribbing with RS facing up. Fold in half- bring last row towards 1st row. Place the edges against each other correctly. Ch 1, slst across both edges. Do not fasten off. –7 slst
Body
Rnd 1 (RS): Ch 1, sc at side of same row, sc at side of each row of ribbing, slst to 1st sc. -50 (54, 60) sc
Alteration note: Total sc may be different depending on ribbing rows, but must be an even number.
Rnd 2: Ch 1, (sc, dc) in 1st sc, sk next sc, *(sc, dc) in next sc, sk next sc; rep from * around, slst to 1st sc. -50 (54, 60) st in all rnds till we reach crown.
(Note: End rnd with (sc, dc) in 2nd last sc, sk last sc)
Rnd 3: Ch 1, (sc, dc) in 1st sc, sk next dc, *(sc, dc) in next sc, sk next dc; rep from * around, slst to 1st sc.
Rnd 3 to rnd 11 (12, 13): Rep rnd 3 for pattern 8 (9, 10) times.
Alteration note: Rep rnd 3 till hat measures 6 ½ (7, 7 ½)” or 16.5 (17.5, 18.5) cm in height. Rep rnd 3 less/more for a shorter/taller beanie. The folded brim beanie will be 2- 2 ½” or 5 cm longer.
Crown
Note:
- St count does not matter. St count will keep on decreasing in all rnds.
- Rnds start from 1 again.
Rnd 1: Ch 1, (sc, dc) in 1st sc, sk next dc, *sc in next sc, sk next dc**, (sc, dc) in next sc, sk next dc; rep from * around, slst to 1st sc. -38 (41, 45) st
Note: For size L, end rnd at **.
Rnd 2: Ch 1, (sc, dc) in 1st sc, sk next (dc, sc), *(sc, dc) in next sc, sk next (dc, sc); rep from * around, slst to 1st sc. -26 (28, 30) st
Note: For sizes S, M end round: (sc, dc) in 2nd last sc, sk last dc, slst to 1st sc.
Rnd 3: Ch 1, (sc, dc) in 1st sc, *sc in next sc**, (sc, dc) in next sc; rep from * around, slst to 1st sc. -20 (21, 23) st
Note: For size M end rnd at **.
Rnd 4: Ch 1, (sc, dc) in 1st sc, sk next (dc, sc), *(sc, dc) in next sc, sk next (dc, sc); rep from * around, slst to 1st sc. -13 (14, 15) st
Note: For sizes S, L end round: (sc, dc) in 2nd last sc, sk last dc, slst to 1st sc.
Fasten off, leaving a 12” or 30 cm tail, weave tail in through remaining stitches of last rnd of hat with tapestry needle, pull up to close top, weave in remaining tail ends on WS.
Pompom
This is optional. Use a pompom maker to make a pompom (check the video tutorial on Youtube) or:
Cut 2 cardboard circles 4” or 10 cm in diameter. Cut a hole about ½- 1” or 2.5 cm in diameter in the centre of both. Hold both the circles together and wrap yarn by going through centre hole over the ring till it is covered in yarn.
Cut the yarn between the 2 circles all around the circumference.
Using a 10” strand of yarn wrap it tightly and tie it between the circles 2- 3 times, make sure the last knot is firm.
Remove cardboards and fluff out the pompom. Trim with scissors so it is even, leave the tying ends for attaching pompom to hat.
Congratulations! Your White Winter Hat is now ready to wear!
Copyright & Permissions
All content in this pattern, including instructions, photos, and design, is protected by copyright © Let’s All Crochet.
- This pattern is for personal use only. It may not be copied, altered, translated, resold, taught in classes, or redistributed in any form (digital or physical).
- You are welcome to sell finished items made from this pattern on a small scale, but please use your own photos when promoting your work. Credit to Let’s All Crochet as the pattern designer is appreciated.
- If you’d like to share this pattern, you may share one photo and a direct link to the pattern on crochetwithakita.com. Please do not share or repost the instructions themselves.
This free crochet pattern is provided by Let’s All Crochet for personal use and complies with EU GPSR safety requirements. Read more here

Lorem ipsum dolor sit amet, consectetur adipiscing elit. Ut elit tellus, luctus nec ullamcorper mattis, pulvinar dapibus leo.
Hey, I’m Aki!
Crochet has been a huge part of my life for the past few years, and I still can’t believe I get to do this every day because of wonderful people like you. I’m so happy you’re here!
I design fun, unique crochet patterns with beginner-friendly video tutorials because I believe you should never feel limited—in crochet or in life!